If you are looking for Information about PSU Clementine, Go check their Wiki
Difference between revisions of "Scarred Planet"
From The re-PSUPedia
m (→Item drops) |
(Removed box drop templates.) |
||
| Line 1: | Line 1: | ||
| − | __NOTOC__{{AOTI only}}{{Mission infobox | + | __NOTOC__ |
| + | {{AOTI only}} | ||
| + | {{Mission infobox | ||
|Mission name= Scarred Planet | |Mission name= Scarred Planet | ||
| − | |Mission image= | + | |Mission image= {{Rozenom icon}} |
|Planet= Parum | |Planet= Parum | ||
|Start lobby= Holtes City: East District | |Start lobby= Holtes City: East District | ||
| Line 10: | Line 12: | ||
|Mission type= Free mission | |Mission type= Free mission | ||
|Party= 1-6 players | |Party= 1-6 players | ||
| − | |Enemy elements= {{Fire}} {{Lightning}} {{Light}} | + | |Enemy elements= {{Fire}} {{Lightning}} {{Light}}}} |
| − | }}''Rozenom City has been reduced to rubble by the G. Colony impact, and its former residents are defenseless against the violent native creatures.'' | + | ''Rozenom City has been reduced to rubble by the G. Colony impact, and its former residents are defenseless against the violent native creatures.'' |
== Mission requirements and rewards == | == Mission requirements and rewards == | ||
| Line 95: | Line 97: | ||
| [[{{Seasonal enemy|Rappy}}]] || {{{{Seasonal enemy|Rappy}} | AOTI special}} || {{{{Seasonal enemy|Rappy}} | AOTI 1}} || {{{{Seasonal enemy|Rappy}} | AOTI 20}} || {{{{Seasonal enemy|Rappy}} | AOTI 50}} || {{{{Seasonal enemy|Rappy}} | AOTI 100}} || {{{{Seasonal enemy|Rappy}} | AOTI 150}} | | [[{{Seasonal enemy|Rappy}}]] || {{{{Seasonal enemy|Rappy}} | AOTI special}} || {{{{Seasonal enemy|Rappy}} | AOTI 1}} || {{{{Seasonal enemy|Rappy}} | AOTI 20}} || {{{{Seasonal enemy|Rappy}} | AOTI 50}} || {{{{Seasonal enemy|Rappy}} | AOTI 100}} || {{{{Seasonal enemy|Rappy}} | AOTI 150}} | ||
|- | |- | ||
| − | | [[Box drops#Normal boxes|Normal box]] || | + | | [[Box drops#Normal boxes|Normal box]] || [[Container]]<br/>[[Mysterious Meter]] || [[Synthesis materials#Metals|1-4★ -tite metals]]<br/>[[Synthesis materials#Wood|2★ Par. wood]]<br/>[[Copernia]] || [[Synthesis materials#Metals|1-7★ -tite metals]]<br/>[[Synthesis materials#Wood|2-5★ Par. wood]]<br/>[[Silvenia]] || [[Synthesis materials#Metals|1-7★ -tite metals]]<br/>[[Synthesis materials#Wood|2-5★ Par. wood]]<br/>[[Goldania]] || [[Synthesis materials#Metals|4-10★ -tite metals]]<br/>[[Synthesis materials#Wood|5-11★ Par. wood]]<br/>[[Titania]] || [[Synthesis materials#Metals|4-10★ -tite metals]]<br/>[[Synthesis materials#Wood|5-11★ Par. wood]]<br/>[[Lithnia]] |
|- | |- | ||
| − | | [[Box drops#Objects|Debris]] || -- || [[Synthesis materials#Hard materials|2★ Nano-types]] || [[Synthesis materials#Hard materials|2★ Nano-types]] || [[Synthesis materials#Hard materials|2-8★ Nano-types]] || [[Synthesis Materials#Hard materials|5-11★ Nano-types]] | + | | [[Box drops#Objects|Debris]] || -- || [[Synthesis materials#Hard materials|2★ Nano-types]] || [[Synthesis materials#Hard materials|2★ Nano-types]] || [[Synthesis materials#Hard materials|2-8★ Nano-types]] || [[Synthesis Materials#Hard materials|5-11★ Nano-types]] || [[Synthesis Materials#Hard materials|5-11★ Nano-types]] |
| − | |||
| − | |||
|- | |- | ||
| [[Box drops#Clear boxes|Clear box]] || -- || [[Twin Brand]]<br/>[[Brand]]<br/>[[Knife]]<br/>[[Card Fante]]<br/>[[Staff]]<br/>[[Mega / Knight]]<br/>[B] [[Twin Brand]]<br/>[B] [[Brand]]<br/>[B] [[Knife]]<br/>[B] [[Card Fante]]<br/>[B] [[Staff]]<br/>[B] [[Carline]]<br/>[B] [[Lightline]] || [[Dual Pallasch]]<br/>[[Pallasch]]<br/>[[Sucker]]<br/>[[Card Fante]]<br/>[[Scepter]]<br/>[[Mega / Knight]]<br/>[B] [[Sucker]]<br/>[B] [[Scepter]]<br/>[B] [[Card Fante]]<br/>[B] [[Busterline]] || [[Death Dancer]]<br/>[[Jitseen]]<br/>[[Rapid Stream]]<br/>[[Card Fante]]<br/>[[Prest]]<br/>[[Hard / Night]]<br/>[B] [[Jitseen]]<br/>[B] [[Rapid Stream]]<br/>[B] [[Card Fante]]<br/>[B] [[Teroline]] || [[Two-headed Ragnus]]<br/>[[Crimson]]<br/>[[Blumier]]<br/>[[Card Regas]]<br/>[[Serdote]]<br/>[[Solid / Knight]]<br/>[B] [[2-headed Ragnus]]<br/>[B] [[Crimson]]<br/>[B] [[Blumier]]<br/>[B] [[Card Regas]]<br/>[B] [[Serdote]]<br/>[B] [[Catiline]]<br/>[B] [[Delette Line]] || [[Grand Cross]]<br/>[[Blackheart]]<br/>[[Blumier]]<br/>[[Card Regas]]<br/>[[Serdote]]<br/>[[Lumirus/Kaos Knight]]<br/>[B] [[Grand Cross]]<br/>[B] [[Blackheart]]<br/>[B] [[Blumier]]<br/>[B] [[Card Regas]]<br/>[B] [[Serdote]]<br/>[B] [[Catiline]]<br/>[B] [[Delette Line]] | | [[Box drops#Clear boxes|Clear box]] || -- || [[Twin Brand]]<br/>[[Brand]]<br/>[[Knife]]<br/>[[Card Fante]]<br/>[[Staff]]<br/>[[Mega / Knight]]<br/>[B] [[Twin Brand]]<br/>[B] [[Brand]]<br/>[B] [[Knife]]<br/>[B] [[Card Fante]]<br/>[B] [[Staff]]<br/>[B] [[Carline]]<br/>[B] [[Lightline]] || [[Dual Pallasch]]<br/>[[Pallasch]]<br/>[[Sucker]]<br/>[[Card Fante]]<br/>[[Scepter]]<br/>[[Mega / Knight]]<br/>[B] [[Sucker]]<br/>[B] [[Scepter]]<br/>[B] [[Card Fante]]<br/>[B] [[Busterline]] || [[Death Dancer]]<br/>[[Jitseen]]<br/>[[Rapid Stream]]<br/>[[Card Fante]]<br/>[[Prest]]<br/>[[Hard / Night]]<br/>[B] [[Jitseen]]<br/>[B] [[Rapid Stream]]<br/>[B] [[Card Fante]]<br/>[B] [[Teroline]] || [[Two-headed Ragnus]]<br/>[[Crimson]]<br/>[[Blumier]]<br/>[[Card Regas]]<br/>[[Serdote]]<br/>[[Solid / Knight]]<br/>[B] [[2-headed Ragnus]]<br/>[B] [[Crimson]]<br/>[B] [[Blumier]]<br/>[B] [[Card Regas]]<br/>[B] [[Serdote]]<br/>[B] [[Catiline]]<br/>[B] [[Delette Line]] || [[Grand Cross]]<br/>[[Blackheart]]<br/>[[Blumier]]<br/>[[Card Regas]]<br/>[[Serdote]]<br/>[[Lumirus/Kaos Knight]]<br/>[B] [[Grand Cross]]<br/>[B] [[Blackheart]]<br/>[B] [[Blumier]]<br/>[B] [[Card Regas]]<br/>[B] [[Serdote]]<br/>[B] [[Catiline]]<br/>[B] [[Delette Line]] | ||
Revision as of 15:46, 11 August 2009
| Scarred Planet ミッション名が不明 | |
|---|---|
| Start lobby | Holtes City: East District |
| Start counter | Flyer Base |
| End lobby | Old Rozenom City |
| Version | Ambition of the Illuminus |
| Field | Old Rozenom City |
| Mission type | Free mission |
| Party size | 1-6 players |
| Enemy elements | |
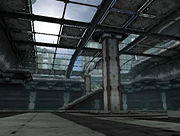
Rozenom City has been reduced to rubble by the G. Colony impact, and its former residents are defenseless against the violent native creatures.
Mission requirements and rewards
| LV | Req. LV | Enemy LV | Rank S | Rank A | Rank B | Rank C | ||||
|---|---|---|---|---|---|---|---|---|---|---|
| Meseta | Points | Meseta | Points | Meseta | Points | Meseta | Points | |||
| C | 1 | 5+ | 800 | 21 | 525 | 14 | 250 | 7 | 0 | 0 |
| B | 10 | 25+ | 2325 | 46 | 1550 | 30 | 775 | 15 | 0 | 0 |
| A | 25 | 50+ | 3875 | 71 | 2575 | 47 | 1275 | 23 | 0 | 0 |
| S | 60 | 100+ | 6525 | 113 | 4350 | 75 | 2175 | 37 | 0 | 0 |
| PA Fragment x1 | ||||||||||
| S2 | 100 | 150+ | 8125 | 138 | 5400 | 92 | 2700 | 46 | 0 | 0 |
| PA Fragment x2 | ||||||||||
Enemy information
| Enemy name | Enemy buffs | Ele. | Mission LV C | Mission LV B | Mission LV A | Mission LV S | Mission LV S2 | |||||
|---|---|---|---|---|---|---|---|---|---|---|---|---|
| LV | EXP | LV | EXP | LV | EXP | LV | EXP | LV | EXP | |||
| Go Bajilla | |
5 | 8 | 25 | 32 | 50 | 62 | 100 | 152 | 150 | 272 | |
| Go Bajilla | |
|
5 | 12 | 25 | 48 | 50 | 93 | 100 | 228 | 150 | 408 |
| Vahra | |
5 | 14 | 25 | 54 | x | x | x | x | x | x | |
| Vahra | |
5 | 16 | 25 | 64 | x | x | x | x | x | x | |
| Vahra | |
5 | 16 | 25 | 64 | x | x | x | x | x | x | |
| Vahra | |
|
5 | 20 | 25 | 77 | x | x | x | x | x | x |
| Go Vahra | |
x | x | x | x | 50 | 104 | 100 | 254 | 150 | 454 | |
| Go Vahra | |
|
x | x | x | x | 50 | 124 | 100 | 304 | 150 | 544 |
| Go Vahra | |
|
x | x | x | x | 50 | 124 | 100 | 304 | 150 | 544 |
| Go Vahra | |
|
x | x | x | x | 50 | 149 | 100 | 365 | 150 | 653 |
| Volfu | |
5 | 14 | 25 | 54 | 50 | 104 | 100 | 254 | 150 | 454 | |
| Volfu | |
|
5 | 21 | 25 | 81 | 50 | 156 | 100 | 381 | 150 | 681 |
| Golmoro | |
5 | 14 | 25 | 54 | 50 | 104 | 100 | 254 | 150 | 454 | |
| Bal Soza | |
5 | 28 | 25 | 108 | 50 | 208 | 100 | 508 | 150 | 908 | |
| Grass Assassin | |
15 | 153 | 35 | 333 | 60 | 603 | 110 | 1323 | 160 | 2223 | |
| Rare enemy | ||||||||||||
| Rappy | |
5 | 70 | 25 | 270 | 50 | 520 | 100 | 1270 | 150 | 2270 | |
Item drops
Enemy spawn chart
| Map route | Pattern | Block 1 details | Block 2 details | Block 3 details | Rare spawn |
|---|---|---|---|---|---|
| A-1 | Third spawn: Bal Soza x2 & Volfu x2 |
Initial spawn: Golmoro x3 |
Initial spawn: Go Bajilla x3 → Bal Soza x1 & Grass Assassin x2 |
||
| A-2 | Third spawn: Bal Soza x2 & Golmoro x? |
Initial spawn: Vahra x3 |
Initial spawn: Go Bajilla x3 → Bal Soza x1 & Grass Assassin x2 |
||
| A-3 | Third spawn: Bal Soza x2 & Vahra x? |
Initial spawn: Volfu x3 |
Initial spawn: Go Bajilla x3 → Bal Soza x1 & Grass Assassin x2 |
||
| A-X | Third spawn: Bal Soza x2 & Vahra x2 |
Initial spawn: Volfu x3 |
Initial spawn: Go Bajilla x3 → Grass Assassin x3 |
Block 3: Rappy x2 | |
| B-1 | Second spawn: Go Bajilla x6 → Vahra x5 |
Second spawn: Volfu x3+2 |
Initial spawn: Go Bajilla x3+3 → Bal Soza x1 & Grass Assassin x2 |
||
| B-2 | Second spawn: Go Bajilla x6 → Volfu x5 |
Second spawn: Golmoro x3+2 |
Initial spawn: Go Bajilla x3 → Bal Soza x1 & Grass Assassin x2 |
||
| B-3 | Second spawn: Go Bajilla x6 → Golmoro x5 |
Second spawn: Vahra x3+2 |
Initial spawn: Go Bajilla x3 → Bal Soza x1 & Grass Assassin x2 |
||
| B-X | Second spawn: Go Bajilla x6 → Golmoro x5 |
Second spawn: Vahra x3+2 |
Initial spawn: Go Bajilla x3 → Grass Assassin x3 |
Block 3: Rappy x2 | |
| C-1 | Second spawn: Golmoro x6 |
Initial spawn: Bal Soza x3 & Vahra x1+5 |
Initial spawn: Go Bajilla x3 → Bal Soza x1 & Grass Assassin x2 |
||
| C-2 | Second spawn: Vahra x6 |
Initial spawn: Bal Soza x3 & Volfu x1+5 |
Initial spawn: Go Bajilla x3 → Bal Soza x1 & Grass Assassin x2 |
||
| C-3 | Second spawn: Volfu x6 |
Initial spawn: Bal Soza x3 & Golmoro x1+5 |
Initial spawn: Go Bajilla x3 → Bal Soza x1 & Grass Assassin x2 |
||
| C-X | Second spawn: Volfu x6 |
Initial spawn: Bal Soza x3 & Golmoro x1+5 |
Initial spawn: Go Bajilla x3 → Grass Assassin x3 |
Block 3: Rappy x2 |
- Pattern A, block 1: Initial spawn is always Go Bajilla x5+3, second spawn is always Go Bajilla x?.
- Pattern A, block 1: The first Bal Soza spawn you see must be the blue one for a potential rare map. It is orange for A-1 and A-2.
- Pattern B, blocks 1 and 2: Initial spawn is always Go Bajilla x4.
- Pattern C, block 1: Initial spawn is always Go Bajilla x6+2.
- Pattern A, block 2: PSU-wiki has the note (Turn obstacles ahead) to describe the spawn.
- Pattern C, block 2: PSU-wiki has the note (Left to right under the stairs right) to describe the spawn. This is the spawn across the bridge over water, not to the left of the stairs (a dead end room).
- All patterns, block 3: "Initial spawn" describes the spawn in the room to your left upon enterig the block that can actually be skipped.


