If you are looking for Information about PSU Clementine, Go check their Wiki
Difference between revisions of "The Holy Ground"
From The re-PSUPedia
Beatrixkiddo (talk | contribs) |
(→Enemy spawn chart) |
||
| Line 107: | Line 107: | ||
== Enemy spawn chart == | == Enemy spawn chart == | ||
{| class="wikitable" style="text-align:center" | {| class="wikitable" style="text-align:center" | ||
| − | ! Map route | + | ! Map route !! Pattern !! Block 1 features !! Block 2 features !! Block 3 features !! Rare spawn |
| − | ! Pattern | ||
| − | ! Block 1 features | ||
| − | ! Block 2 features | ||
| − | ! Block 3 features | ||
| − | ! Rare spawn | ||
|- | |- | ||
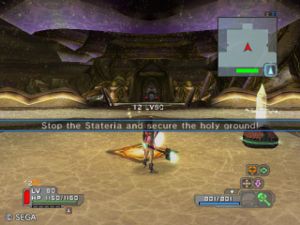
| − | |rowspan="4" align="center"| [[Image:HGlockdoorright.JPG|thumb|center|Locked door to right.]] | + | |rowspan="4" align="center"| [[Image:HGlockdoorright.JPG|thumb|center|Locked door to right.]] |
| − | | A-1 | + | |A-1|| '''Initial spawn:''' <br/> {{RareN|spawn= Gohmon x2 <br/> & Ollaka x1+2}} || '''Initial spawn:''' <br/> Ageeta x3 || '''Initial spawn:''' <br/> Gohmon x2 <br/> + Ageeta x2 || |
| − | | | ||
| − | | | ||
| − | | | ||
| − | | | ||
|- | |- | ||
| − | |A-2 | + | |A-2|| '''Initial spawn:''' {{RareN|spawn=<br/> Ageeta x5}} || '''Initial spawn:''' <br/> Ageeta x3 || '''Initial spawn:''' <br/> Gohmon x3 <br/> → Ollaka x2 || |
| − | | | ||
| − | | | ||
| − | | | ||
| − | |||
| − | | | ||
|- | |- | ||
| − | |A-3 | + | |A-3|| '''Initial spawn:''' <br/> Ageeta x3+2 || '''Initial spawn:''' <br/> {{RareN|spawn=Ollaka x2 <br/> & Gohmon x1}} || '''Initial spawn:''' <br/> Ageeta x2 <br/> & Ollaka x2+1|| |
| − | | | + | |- {{Color-A}} |
| − | | | + | |A-X|| '''Initial spawn:''' <br/> Ageeta x3+2 || '''Initial spawn:''' <br/> {{RareY|spawn= Ageeta x3}} || '''Initial spawn:''' <br/> Ageeta x2 <br/> & Ollaka x2+1 || '''Block 2:''' <br/>{{Seasonal enemy|Rappy}} x2 |
| − | | | ||
| − | |- | ||
| − | |||
| − | | | ||
| − | | | ||
| − | |||
| − | | | ||
|- | |- | ||
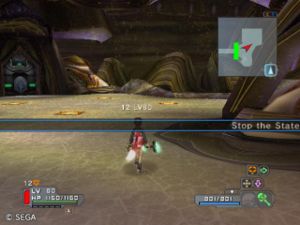
|rowspan="4" align="center"| [[Image:HGleftturn.JPG|thumb|center|Immediate left turn.]] | |rowspan="4" align="center"| [[Image:HGleftturn.JPG|thumb|center|Immediate left turn.]] | ||
| − | | B-1 | + | |B-1|| '''Initial spawn:''' <br/> {{RareN|spawn= Ageeta x3 <br/> + Tengohg x1}} || '''Initial spawn:''' <br/> Ollaka x2 <br/> → Tengohg x1 || '''Initial spawn:''' <br/> Ageeta x2 <br/> & Ollaka x2+1 <br/> + Ollaka x1 || |
| − | | | ||
| − | | | ||
| − | | | ||
| − | | | ||
|- | |- | ||
| − | |B-2 | + | |B-2|| '''Initial spawn:''' <br/> {{RareN|spawn= Gohmon x2 <br/> → Ollaka x2 <br/> → Gohmon x1}} || '''Initial spawn:''' <br/> Ageeta x2 <br/> & Gohmon x1 || '''Initial spawn:''' <br/> Ageeta x2 <br/> & Gohmon x2 || |
| − | | | ||
| − | | | ||
| − | | | ||
| − | | | ||
|- | |- | ||
| − | |B-3 | + | |B-3|| '''Initial spawn:''' <br/> Ageeta x4 <br/> + Kamatoze x1 || '''Initial spawn:''' <br/> {{RareN|spawn= Ageeta x2 <br/> + Tengohg x1 <br/> → Ageeta x4}} || '''Initial spawn:''' <br/> Gohmon x3 <br/> → Ollaka x2 || |
| − | | | + | |- {{Color-A}} |
| − | | | + | |B-X|| '''Initial spawn:''' <br/> Ageeta x4 <br/> + Kamatoze x1 || '''Initial spawn:''' <br/> {{RareY|spawn= Ageeta x2 <br/> + Gohmon x1}} || -- || '''Block 2:'''<br/>{{Seasonal enemy|Rappy}} x3 |
| − | | | ||
| − | | | ||
| − | |- | ||
| − | |||
| − | | | ||
| − | | | ||
| − | | | ||
| − | | | ||
|- | |- | ||
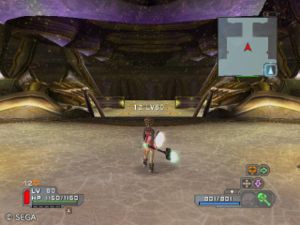
|rowspan="4" align="center"| [[Image:HGlonghall.JPG|thumb|center|Large hallway straight through.]] | |rowspan="4" align="center"| [[Image:HGlonghall.JPG|thumb|center|Large hallway straight through.]] | ||
| − | | C-1 | + | |C-1|| '''Initial spawn:''' <br/> {{RareN|spawn=Ageeta x3 <br/> → gohmon x4+1 <br/> → Tengohg}} || '''Initial spawn:''' <br/> Ollaka x2 <br/> & Ageeta x1 || '''Initial spawn:''' <br/> Gohmon x3 <br/> → Ollaka x2 || |
| − | | | ||
| − | | | ||
| − | | | ||
| − | | | ||
| − | | | ||
| − | |||
| − | |||
| − | |||
| − | | | ||
| − | | | ||
|- | |- | ||
| − | |C- | + | |C-2|| '''Initial spawn:''' {{RareN|spawn=<br/> Ageeta x5+2}} || '''Initial spawn:''' <br/> Gohmon x2 <br/> → Ollaka x2 || '''Initial spawn:''' <br/> Ageeta x2 <br/> Ollaka x2+1 || |
| − | | | ||
| − | | | ||
| − | | | ||
| − | | | ||
|- | |- | ||
| − | | | + | |C-3|| '''Initial spawn:''' <br/> Gohmon x3 <br/> → Ollaka x3 <br/> → Gohmon x2 {{Sword}}{{Shield}}{{Staff}}{{Boot}} ||'''Initial spawn:''' <br/> Ageeta x3 || '''Initial spawn:''' <br/> Ageeta x2 <br/> & Gohmon x2|| |
| − | | | + | |- {{Color-A}} |
| − | | | + | ||C-X|| '''Initial spawn:''' <br/> Gohmon x3 <br/> → Ollaka x3 <br/> → Gohmon x2 {{Sword}}{{Shield}}{{Staff}}{{Boot}} || '''Initial spawn:''' <br/> Ageeta x3 || '''Initial spawn:''' <br/> Ageeta x2 <br/> & Gohmon x2 || '''Block 3:''' <br/> {{RareY|spawn={{Seasonal enemy|Rappy}} x4}} |
| − | | | ||
| − | | | ||
|} | |} | ||
<b>Notes</b>: | <b>Notes</b>: | ||
<br>The rare enemy [[Lutus Jigga]] appears instead of Svaltus for the rare spawns. | <br>The rare enemy [[Lutus Jigga]] appears instead of Svaltus for the rare spawns. | ||
<br>On maps C-X and C-3 the starting spawns are the same, however the large-sized enemy does not appear in the rare variant(?). | <br>On maps C-X and C-3 the starting spawns are the same, however the large-sized enemy does not appear in the rare variant(?). | ||
| − | |||
| − | |||
Revision as of 17:35, 16 December 2009
| The Holy Ground ミッション名が不明 | |
|---|---|
| Start lobby | Agata Islands: Egam |
| Start counter | Agata RELICS Area |
| End lobby | Agata Islands: Egam |
| Version | Phantasy Star Universe |
| Field | Agata RELICS |
| Mission type | Free mission |
| Party size | 1-6 players |
| Enemy elements | |
Mission requirements and rewards
| LV | Req. LV | Enemy LV | Rank S | Rank A | Rank B | Rank C | ||||
|---|---|---|---|---|---|---|---|---|---|---|
| Meseta | Points | Meseta | Points | Meseta | Points | Meseta | Points | |||
| C | 1 | 15+ | 275 | 6 | 175 | 4 | 87 | 2 | 0 | 0 |
| B | 25 | 35+ | 925 | 18 | 612 | 11 | 300 | 5 | 0 | 0 |
| A | 40 | 45+ | 1050 | 20 | 700 | 13 | 350 | 6 | 0 | 0 |
| S | 45 | 75+ | 1200 | 21 | 800 | 14 | 400 | 7 | 0 | 0 |
| PA Fragment x1 | ||||||||||
| S2 | 70 | 85+ | 3525 | 62 | 2350 | 41 | 1175 | 20 | 0 | 0 |
| PA Fragment x2 | ||||||||||
Enemy information
| Enemy name | Enemy buffs | Ele. | Mission LV C | Mission LV B | Mission LV A | Mission LV S | Mission LV S2 | |||||
|---|---|---|---|---|---|---|---|---|---|---|---|---|
| LV | EXP | LV | EXP | LV | EXP | LV | EXP | LV | EXP | |||
| Ageeta | |
15 | 20 | 35 | 44 | 45 | 56 | 75 | 107 | 85 | 125 | |
| Gohmon | |
15 | 40 | 35 | 88 | 45 | 112 | x | x | x | x | |
| Gohmon | |
|
15 | 57 | 35 | 126 | 45 | 161 | x | x | x | x |
| Olgohmon | |
x | x | x | x | x | x | 75 | 214 | 85 | 250 | |
| Olgohmon | |
|
x | x | x | x | x | x | 75 | 308 | 85 | 360 |
| Ollaka | |
15 | 34 | 35 | 74 | 45 | 94 | 75 | 179 | 85 | 209 | |
| Kamatoze | |
15 | 153 | 35 | 333 | 45 | 423 | 75 | 805 | 85 | 940 | |
| Tengohg | |
15 | 142 | 35 | 310 | 45 | 394 | 75 | 751 | 85 | 877 | |
| Galvapas | |
15 | 146 | 35 | 318 | 45 | 404 | x | x | x | x | |
| Zamvapas | |
x | x | x | x | x | x | 75 | 769 | 85 | 898 | |
| Svaltus | |
15 | 282 | 35 | 614 | 45 | 780 | 75 | 1485 | 85 | 1734 | |
| Rare enemy | ||||||||||||
| Rappy | |
15 | 170 | 35 | 370 | 45 | 470 | 75 | 895 | 85 | 1045 | |
| Lutus Jigga | |
15 | 282 | 35 | 614 | 45 | 780 | 75 | 1485 | 85 | 1734 | |
Item drops
Enemy spawn chart
Notes:
The rare enemy Lutus Jigga appears instead of Svaltus for the rare spawns.
On maps C-X and C-3 the starting spawns are the same, however the large-sized enemy does not appear in the rare variant(?).


