If you are looking for Information about PSU Clementine, Go check their Wiki
Difference between revisions of "Mizuraki Defense"
From The re-PSUPedia
(→Enemy information: Added missing values) |
m (→Enemy spawn chart) |
||
| Line 81: | Line 81: | ||
== Enemy spawn chart == | == Enemy spawn chart == | ||
{| class="wikitable" style="text-align:center" | {| class="wikitable" style="text-align:center" | ||
| + | ! Map route | ||
| + | ! Pattern | ||
| + | ! Block 1 features | ||
| + | ! Block 2 features | ||
| + | ! Block 3 features | ||
| + | ! Rare spawn | ||
|- | |- | ||
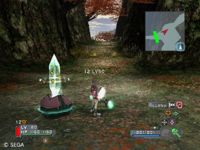
| − | + | | rowspan="4"| [[Image:MDleft0box.JPG|thumb|200px|center|Path heading left (no boxes)]] | |
| + | | A-1 | ||
| + | | '''Initial spawn:'''<br>[[Gohmon]] x3 | ||
| + | | '''Initial spawn:'''<br>[[Ageeta]] x3 | ||
| + | | '''Initial spawn:'''<br>[[Gohmon]] x3 | ||
| + | | | ||
|- | |- | ||
| − | + | | A-2 | |
| + | | '''Initial spawn:'''<br>[[Ageeta]] x3 | ||
| + | | '''Initial spawn:'''<br>[[Ageeta]] x3 | ||
| + | | '''Initial spawn:'''<br>[[Ageeta]] x3 | ||
| + | | | ||
|- | |- | ||
| − | | A- | + | | A-3 |
| + | | '''Initial spawn:'''<br>[[Ageeta]] x3 | ||
| + | | '''Initial spawn:'''<br>[[Ageeta]] x3 | ||
| + | | '''Initial spawn:'''<br>[[Ageeta]] x4 | ||
| + | | | ||
| + | |- style="background:#cfc" | ||
| + | | A-X | ||
| + | | '''Initial spawn:'''<br>[[Gohmon]] x3 | ||
| + | | '''Initial spawn:'''<br>[[Ageeta]] x3 [[Goshin]] x2 [[ollaka]] x3 | ||
| + | | '''Initial spawn:'''<br>[[Gohmon]] x3 | ||
| + | | '''Block 3:'''<br>[[Rappy]] x3 | ||
|- | |- | ||
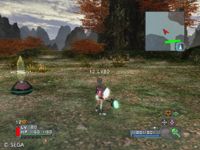
| − | | | + | | rowspan="4"| [[Image:MDleft3box.JPG|thumb|200px|center|Path heading left (Boxes x3)]] |
| − | |- | + | | B-1 |
| − | | | + | | '''Initial spawn:'''<br>[[Ageeta]] x3 |
| + | | '''Initial spawn:'''<br>[[Ageeta]] x3 | ||
| + | | '''Initial spawn:'''<br>[[Gohmon]] x3 | ||
| + | | | ||
|- | |- | ||
| − | + | | B-2 | |
| + | | '''Initial spawn:'''<br>[[Ageeta]] x4 | ||
| + | | '''Initial spawn:'''<br>[[Ageeta]] x3 | ||
| + | | '''Initial spawn:'''<br>[[Gohmon]] x3 | ||
| + | | | ||
|- | |- | ||
| − | | B- | + | |B-3 |
| + | | '''Initial spawn:'''<br>[[Gohmon]] x3 | ||
| + | | '''Initial spawn:'''<br>[[Gohmon]] x3 | ||
| + | | '''Initial spawn:'''<br>[[Ageeta]] x3 | ||
| + | | | ||
| + | |- style="background:#cfc" | ||
| + | | B-X | ||
| + | | '''Initial spawn:'''<br>[[Ageeta]] x3 | ||
| + | | '''Initial spawn:'''<br>[[Ageeta]] x3 | ||
| + | | '''Initial spawn:'''<br>[[Gohmon]] x3 [[Goshin]] x3 [[Gohmon]] x2 | ||
| + | | '''Block 3:'''<br>[[Rappy]] x3 | ||
|- | |- | ||
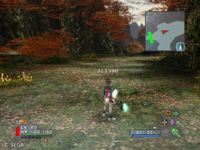
| − | | | + | | rowspan="4"| [[Image:MDstraight.JPG|thumb|200px|center|Straight path]] |
| − | |- | + | | C-1 |
| − | | | + | | '''Initial spawn:'''<br>[[Ageeta]] x3 |
| + | | '''Initial spawn:'''<br>[[Gohmon]] x3 | ||
| + | | '''Initial spawn:'''<br>[[Ageeta]] x3 | ||
| + | | | ||
|- | |- | ||
| − | + | | C-2 | |
| + | | '''Initial spawn:'''<br>[[Gohmon]] x3 | ||
| + | | '''Initial spawn:'''<br>[[Goshin]] x3 | ||
| + | | '''Initial spawn:'''<br>[[Ageeta]] x4 | ||
| + | | | ||
|- | |- | ||
| − | | C- | + | | C-3 |
| − | | | + | | '''Initial spawn:'''<br>[[Gohmon]] x3 |
| − | + | | '''Initial spawn:'''<br>[[Gohmon]] x3 | |
| − | |- | + | | '''Initial spawn:'''<br>[[Ageeta]] x3 |
| − | | C-X || || | + | | |
| + | |- style="background:#cfc" | ||
| + | | C-X | ||
| + | | '''Initial spawn:'''<br>[[Gohmon]] x3 [[Gohmon]] x3 + [[Goshin]] x2 | ||
| + | | '''Initial spawn:'''<br>[[Gohmon]] x3 [[Ageeta]] x4 + [[Goshin]] x1 | ||
| + | | '''Initial spawn:'''<br>[[Ageeta]] x3 | ||
| + | | '''Block 2:'''<br>[[Rappy]] x3 | ||
|} | |} | ||
[[Category:Free missions]] | [[Category:Free missions]] | ||
Revision as of 07:21, 17 June 2008
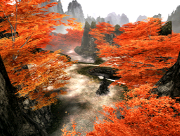
| Mizuraki Defense ミッション名が不明 | |
|---|---|
| Start lobby | Ohtoku City |
| Start counter | Flyer Base |
| End lobby | Kego Clearing |
| Version | Phantasy Star Universe |
| Field | Mizuraki C.D. |
| Mission type | Free mission |
| Party size | 1-6 players |
| Enemy elements | |
Mission requirements and rewards
| LV | Req. LV | Enemy LV | Rank S | Rank A | Rank B | Rank C | ||||
|---|---|---|---|---|---|---|---|---|---|---|
| Meseta | Points | Meseta | Points | Meseta | Points | Meseta | Points | |||
| C | 1 | 15+ | 225 | 5 | 150 | 3 | 75 | 1 | 0 | 0 |
| B | 15 | 25+ | 350 | 7 | 225 | 4 | 112 | 2 | 0 | 0 |
| A | 30 | 35+ | 450 | 9 | 300 | 5 | 150 | 2 | 0 | 0 |
| S | 35 | 60+ | 1900 | 34 | 1262 | 22 | 625 | 11 | 0 | 0 |
| PA Fragment x1 | ||||||||||
| S2 | 60 | 95+ | 4100 | 72 | 2725 | 47 | 1362 | 23 | 0 | 0 |
| PA Fragment x2 | ||||||||||
Enemy information
| Enemy name | Enemy buffs | Ele. | Mission LV C | Mission LV B | Mission LV A | Mission LV S | Mission LV S2 | |||||
|---|---|---|---|---|---|---|---|---|---|---|---|---|
| LV | EXP | LV | EXP | LV | EXP | LV | EXP | LV | EXP | |||
| Ageeta | |
15 | 20 | 25 | 32 | 35 | 44 | 60 | 80 | 95 | 143 | |
| Gohmon | |
15 | 40 | 25 | 64 | 35 | 88 | x | x | x | x | |
| Olgohmon | |
x | x | x | x | x | x | 60 | 160 | 95 | 286 | |
| Goshin | |
15 | 34 | 25 | 54 | 35 | 74 | 60 | 134 | 95 | 239 | |
| Ollaka | |
15 | 34 | 25 | 54 | 35 | 74 | 60 | 134 | 95 | 239 | |
| Rare enemy | ||||||||||||
| Rappy | |
-- | -- | -- | -- | -- | -- | -- | -- | -- | -- | |
Item drops
| Enemy name | Special drops | Mission LV C | Mission LV B | Mission LV A | Mission LV S | Mission LV S2 |
|---|---|---|---|---|---|---|
| Ageeta | -- | [B] Hel-senba | [B] Reiha-senba | [B] Ageha-senba | [B] Nafri-senba | |
| Gohmon | -- | Starra | Batnara | Septara | x | x |
| Olgohmon | -- | x | x | x | Cometara | |
| Goshin | -- | [B] Nafli-zashi | [B] Stina-zashi | [B] Sakano-zashi | [B] Asami-zashi | |
| Ollaka | Ollaka Meat | Snihoh | Brahoh | Saiyuhoh | Falgohoh | |
| Rappy | Rappy Feather | Perpa / Power | Mega / Power | Mega / Knight | Giga / Skill PP Save | |
| Normal box | Nagaraki Syrup Scroll |
1-4★ -ral metals 2-5★ Neu. wood |
1-7★ -ral metals 2-8★ Neu. wood |
1-7★ -ral metals 2-8★ Neu. wood |
1-10★ -ral metals 2-11★ Neu. wood |
|
| Area drops | -- | 1-7★ ores | 1-8★ ores Olpad |
2-9★ ores Olpad [B] Ryo-Crezashi [B] Crea-zashi |
5-12★ ores Olpad, Rubinad, Tormad, Citrad, Berilad [B] Ryo-Crezashi [B] Crea-zashi |
Enemy spawn chart
| Map route | Pattern | Block 1 features | Block 2 features | Block 3 features | Rare spawn |
|---|---|---|---|---|---|
| A-1 | Initial spawn: Gohmon x3 |
Initial spawn: Ageeta x3 |
Initial spawn: Gohmon x3 |
||
| A-2 | Initial spawn: Ageeta x3 |
Initial spawn: Ageeta x3 |
Initial spawn: Ageeta x3 |
||
| A-3 | Initial spawn: Ageeta x3 |
Initial spawn: Ageeta x3 |
Initial spawn: Ageeta x4 |
||
| A-X | Initial spawn: Gohmon x3 |
Initial spawn: Ageeta x3 Goshin x2 ollaka x3 |
Initial spawn: Gohmon x3 |
Block 3: Rappy x3 | |
| B-1 | Initial spawn: Ageeta x3 |
Initial spawn: Ageeta x3 |
Initial spawn: Gohmon x3 |
||
| B-2 | Initial spawn: Ageeta x4 |
Initial spawn: Ageeta x3 |
Initial spawn: Gohmon x3 |
||
| B-3 | Initial spawn: Gohmon x3 |
Initial spawn: Gohmon x3 |
Initial spawn: Ageeta x3 |
||
| B-X | Initial spawn: Ageeta x3 |
Initial spawn: Ageeta x3 |
Initial spawn: Gohmon x3 Goshin x3 Gohmon x2 |
Block 3: Rappy x3 | |
| C-1 | Initial spawn: Ageeta x3 |
Initial spawn: Gohmon x3 |
Initial spawn: Ageeta x3 |
||
| C-2 | Initial spawn: Gohmon x3 |
Initial spawn: Goshin x3 |
Initial spawn: Ageeta x4 |
||
| C-3 | Initial spawn: Gohmon x3 |
Initial spawn: Gohmon x3 |
Initial spawn: Ageeta x3 |
||
| C-X | Initial spawn: Gohmon x3 Gohmon x3 + Goshin x2 |
Initial spawn: Gohmon x3 Ageeta x4 + Goshin x1 |
Initial spawn: Ageeta x3 |
Block 2: Rappy x3 |


