If you are looking for Information about PSU Clementine, Go check their Wiki
Temple of Traps (guide)
From The re-PSUPedia
 |
This article is a guide and may contain opinions or other subjective information. The PSUPedia is not responsible for any inaccuracies or mistakes. |
Obtaining a grade of S in Temple of Traps requires you to collect all six discs scattered throughout the mission. However, the task is not as simple as it sounds. As the mission name suggests, this temple is loaded with traps, most of which will go off at the slightest touch. In fact, a stray enemy can even trigger an explosion! Take note that traps are linked with certain discs, so setting one off will make it impossible to obtain all discs.
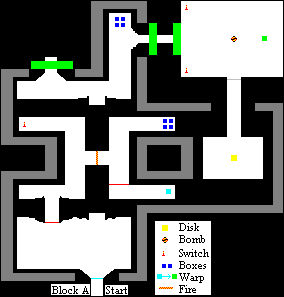
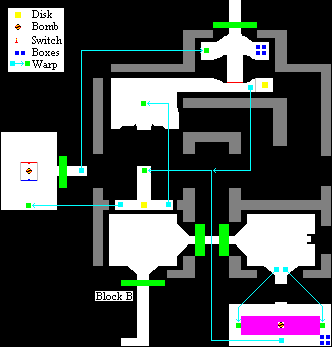
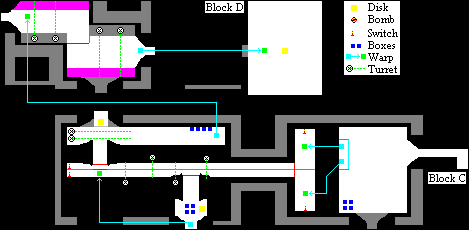
Maps
 
|

|
Disc locations
Block A
- After taking the mission's first teleporter, you and your party will be transported to a large square room. At this point, you will have 30 seconds to navigate around the mine floating in the center of the room and simultaneously activate two switches located at adjacent corners. Successfully doing so will unlock a door leading to a hidden room where the first disc is located.
Block B
- In the second room of this block, there are two side-by-side teleporters. Split up your party between the teleporters. Each teleporter will place their entrants right on the edge of a pink block in the next room. This block designate the area of activation for the trap in the center of the room. Be careful to not cross into this path or the trap will explode, making it impossible to obtain this disc. Next, numerous Armed Servant (Obme) and Rappy Polecs will spawn. You will have 30 seconds from entering the room to defeat these enemies. Remember, the enemies must not cross into the pink area as they will set off the trap.
- After clearing that room, taking the teleporter that appears will transport you to a T-shaped walkway. At either end of the horizontal path are two more teleporters. Split the party again. Whoever goes through the left teleporter (east side for fixed maps) will be required to identify the element of the Ubakrada that spawns in the next room. This element will then be used by the party members who go through the right teleporter (west side for fixed maps) to determine which laser to destroy in the room they are transported to. If the Ubakrada is fire, destroy the red laser; if it is ice, destroy the blue laser. Be careful that the enemies in this room do not trigger the trap! The corresponding disc is located in a small room where the Ubakrada spawned.
Block C
- At the teleporters in this block's first room, your party will be split apart. Upon transporting to the next area, you will be at one end of a long, narrow hallway separated by a fence. From the sidelines, turrets will be firing lasers that you must dodge while running the length of the path. Upon entering this room, you and your teammates on the path next to you will have 30 seconds to make it to the end of the hallway where two switches that must be pressed simultaneously are located. Enemies will spawn in your way, but these should be skipped at first to ensure that the switches are activated before time runs out. Once the switches are activated, the fourth disc will appear in small room at the top of the stairs midway through the left-hand path.
- In the same pathway, once all enemies are defeated, the fence blocking the stairs leading north will deactivate. Once the enemies on this landing are defeated, the fifth disc will appear in a small room located at the top of the stairs at the end of the right-hand path. Walk through the fake wall here to reach it. The warp at the end of the landing will lead to a room lined with laser turrets and bomb trigger areas. Watch your step!
Block D
- Simply clear the final room of all enemies. Once cleared, the final disc will appear in the center of the room.