If you are looking for Information about PSU Clementine, Go check their Wiki
Difference between revisions of "Sakura Blast"
From The re-PSUPedia
Shadowlb91 (talk | contribs) (→Enemy information) |
(→Enemy spawn chart: pix added) |
||
| Line 87: | Line 87: | ||
! Map route !! Pattern !! Block 1 initial spawn !! Block 2 initial spawn !! Block 3 initial spawn !! Block 4 inital spawn !! Rare enemy details | ! Map route !! Pattern !! Block 1 initial spawn !! Block 2 initial spawn !! Block 3 initial spawn !! Block 4 inital spawn !! Rare enemy details | ||
|- | |- | ||
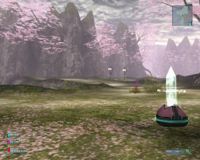
| − | | rowspan="4" | || A-1 || [[Sageeta]] x4 || || || || | + | | rowspan="4" | [[Image:Sakura_Blast_A.jpg|thumb|200px|center|Crystal on right side.]] || A-1 || [[Sageeta]] x4 || || || || |
|- | |- | ||
| A-2 || [[Booma]] x2 [[Sageeta]] x2|| || || || | | A-2 || [[Booma]] x2 [[Sageeta]] x2|| || || || | ||
| Line 95: | Line 95: | ||
| A-X || [[Booma]] x4 || [[Sageeta]] x3 + [[Sageeta]] x3 + [[Sageeta]] x5 || [[Sageeta]] x3 → [[Booma]] x3 || [[Booma]] x5 || [[Jigo Booma]] x4 | | A-X || [[Booma]] x4 || [[Sageeta]] x3 + [[Sageeta]] x3 + [[Sageeta]] x5 || [[Sageeta]] x3 → [[Booma]] x3 || [[Booma]] x5 || [[Jigo Booma]] x4 | ||
|- | |- | ||
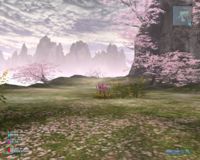
| − | | rowspan="4" | || B-1 || [[Booma]] x5 || || || || | + | | rowspan="4" | [[Image:Sakura_Blast_B.jpg|thumb|200px|center|Straight ahead.]] || B-1 || [[Booma]] x5 || || || || |
|- | |- | ||
| B-2 || [[Sageeta]] x5 || || || || | | B-2 || [[Sageeta]] x5 || || || || | ||
| Line 103: | Line 103: | ||
| B-X || [[Sageeta]] x3 + [[Sageeta]] x2 || (Left side) [[Sageeta]] x4 + [[Sageeta]] x2<br>(Right side) [[Booma]] x4 || [[Booma]] x4 || [[Booma]] x5 || [[Jigo Booma]] x4 | | B-X || [[Sageeta]] x3 + [[Sageeta]] x2 || (Left side) [[Sageeta]] x4 + [[Sageeta]] x2<br>(Right side) [[Booma]] x4 || [[Booma]] x4 || [[Booma]] x5 || [[Jigo Booma]] x4 | ||
|- | |- | ||
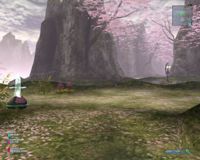
| − | | rowspan="4" | || C-1 || (Left side) [[Sageeta]] x3 [[Ubakrada]] x1 + [[Sageeta]] x2<br>(Right side) [[Booma]] x4 || || || || | + | | rowspan="4" | [[Image:Sakura_Blast_C.jpg|thumb|200px|center|Crystal on left side.]] || C-1 || (Left side) [[Sageeta]] x3 [[Ubakrada]] x1 + [[Sageeta]] x2<br>(Right side) [[Booma]] x4 || || || || |
|- | |- | ||
| C-2 || (Left side) [[Sageeta]] x4 + [[Sageeta]] x2<br>(Right side) [[Sageeta]] x4 || || || || | | C-2 || (Left side) [[Sageeta]] x4 + [[Sageeta]] x2<br>(Right side) [[Sageeta]] x4 || || || || | ||
Revision as of 23:12, 25 December 2007
Template:Neudaiz missionThe protected Saguraki woods are being destroyed by huge numbers of Komazli. Defeat their leaders to save the Saguraki Conservation District.
Mission requirements and rewards
| LV | Req. LV | Enemy LV | Rank S | Rank A | Rank B | Rank C | ||||
|---|---|---|---|---|---|---|---|---|---|---|
| Meseta | Points | Meseta | Points | Meseta | Points | Meseta | Points | |||
| C | 1 | 20+ | 2275 | 46 | 1500 | 30 | -- | -- | 0 | 0 |
| B | 30 | 45+ | 4250 | 78 | -- | -- | -- | -- | 0 | 0 |
| A | 45 | 75+ | 6150 | 108 | -- | -- | -- | -- | 0 | 0 |
| S | 75 | 110+ | 7750 | 134 | -- | -- | -- | -- | 0 | 0 |
| PA Fragment x1 | ||||||||||
| S2 | -- | -- | -- | -- | -- | -- | -- | -- | 0 | 0 |
| PA Fragment x2 | ||||||||||
Enemy information
| Enemy name | Enemy buffs | Ele. | Mission LV C | Mission LV B | Mission LV A | Mission LV S | Mission LV S2 | |||||
|---|---|---|---|---|---|---|---|---|---|---|---|---|
| LV | EXP | LV | EXP | LV | EXP | LV | EXP | LV | EXP | |||
| Sageeta | |
20 | 26 | 45 | 56 | 75 | 107 | -- | -- | -- | -- | |
| Booma | |
20 | 44 | 45 | 94 | 75 | 179 | -- | -- | -- | -- | |
| Go Booma | |
20 | 66 | 45 | 141 | 75 | 278 | -- | -- | -- | -- | |
| Ubakrada | |
20 | 176 | 45 | 376 | 75 | 716 | -- | -- | -- | -- | |
| Rare enemy | ||||||||||||
| Jigo Booma | |
-- | -- | -- | -- | -- | -- | -- | -- | -- | -- | |
| Mini-boss | ||||||||||||
| Komazli | |
30 | 128 | 55 | 238 | -- | -- | -- | -- | -- | -- | |
| Komazli | |
|
30 | 192 | 55 | 357 | -- | -- | -- | -- | -- | -- |
Item drops
Enemy spawn chart
| Map route | Pattern | Block 1 initial spawn | Block 2 initial spawn | Block 3 initial spawn | Block 4 inital spawn | Rare enemy details |
|---|---|---|---|---|---|---|
| A-1 | Sageeta x4 | |||||
| A-2 | Booma x2 Sageeta x2 | |||||
| A-3 | Booma x4 | Sageeta x3 + Sageeta x2 + Sageeta x5 | Sageeta x3 → Booma x3 | Booma x5 | ||
| A-X | Booma x4 | Sageeta x3 + Sageeta x3 + Sageeta x5 | Sageeta x3 → Booma x3 | Booma x5 | Jigo Booma x4 | |
| B-1 | Booma x5 | |||||
| B-2 | Sageeta x5 | |||||
| B-3 | Sageeta x3 + Sageeta x2 | (Left side) Sageeta x4 + Sageeta x2 (Right side) Booma x4 |
Booma x4 | Booma x5 | ||
| B-X | Sageeta x3 + Sageeta x2 | (Left side) Sageeta x4 + Sageeta x2 (Right side) Booma x4 |
Booma x4 | Booma x5 | Jigo Booma x4 | |
| C-1 | (Left side) Sageeta x3 Ubakrada x1 + Sageeta x2 (Right side) Booma x4 |
|||||
| C-2 | (Left side) Sageeta x4 + Sageeta x2 (Right side) Sageeta x4 |
|||||
| C-3 | (Left side) Sageeta x4 + Sageeta x2 (Right side) Booma x4 |
Sageeta x3 → Booma x3 | Sageeta x3 | Booma x5 | ||
| C-X | (Left side) Sageeta x4 + Sageeta x2 (Right side) Booma x4 |
Sageeta x3 → Booma x3 | Sageeta x3 | Booma x5 | Jigo Booma x4 |
- The B-X run is identical to B-3 as far as what enemies spawn. Look for an extra lantern in B-X to verify the map.


