If you are looking for Information about PSU Clementine, Go check their Wiki
Bladed Legacy/R (guide)
From The re-PSUPedia
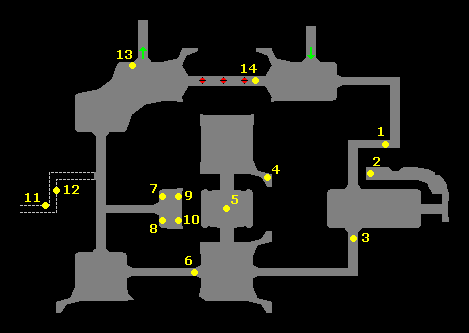
Revision as of 02:53, 23 May 2010 by EspioKaos (talk | contribs) (There's B1. I've got to piece together and pretty-up the map for B2, then I'll work on the terminal locations in the second block.)
 |
This article is a guide and may contain opinions or other subjective information. The PSUPedia is not responsible for any inaccuracies or mistakes. |
Block 1
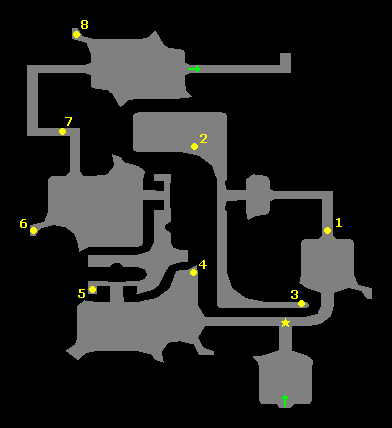
As you begin this block and come to the T-intersection of the bridge (marked on the map by ★), look down into the path below. Notice a trap floating over a small computer terminal. Shoot the trap to destroy it. This will allow you to destroy the terminal in a later step.
- After clearing the room with four switches on the ground, continue through the hallway, but don't go too far. Turn around and look over the door you just came through. Destroy this terminal and continue down the hall.
- Continue on until the hallway ends with a downward slope and splits off to the left and right. Turn right and you'll come to an open area. The terminal here is attached to the underside of an eave, so again it must be shot down. In this same area, enemies will spawn, but you can defeat them first if you like. However, if you do this, do not collect the key that appears until the terminal is destroyed, otherwise the terminal will disappear.
- After the enemies in the large room have been destroyed, a warp will appear at the T-intersection you came from. Do not take this warp. Instead, continue south and follow the hallway to its end. If you destroyed the trap floating over a terminal as mentioned at the beginning of this guide, you will now be able to destroy the third terminal.
- Head back to and take the warp that appeared earlier. It will transport you to the west end of the bridge at the entrance. From here, turn right and check the northeast corner of the large room for the fourth terminal.
- After clearing all of the enemies from the large room, a laser fence will deactivate, giving you access to a ramp. Do not ascend this ramp yet! If you do, a trap will activate, destroying the next terminal. Instead, you first must destroy the trap from the ground level, then ascend the ramp to destroy the terminal yourself.
- Continue on to the next large room where you must defeat multiple waves of enemies to collect four keys. On the west side of this room is a small nook with the sixth terminal to be destroyed.
- After collecting the four keys and unlocking the gate, head down the hallway. Upon taking the first left, stop and check the wall to your left. The seventh terminal is located here.
- The eighth terminal is located in the final room of block 1. Turn left after entering the room and check the northwest corner for it.

