If you are looking for Information about PSU Clementine, Go check their Wiki
Difference between revisions of "AOTI offline:Scarred Planet"
From The re-PSUPedia
Cugastratos (talk | contribs) (→Enemy spawn chart) |
|||
| Line 23: | Line 23: | ||
== Enemy spawn chart == | == Enemy spawn chart == | ||
| − | |||
{| class="wikitable" style="text-align:center" | {| class="wikitable" style="text-align:center" | ||
! Map route !! Pattern !! Block 1 details !! Block 2 details !! Block 3 details !! Rare spawn | ! Map route !! Pattern !! Block 1 details !! Block 2 details !! Block 3 details !! Rare spawn | ||
|- | |- | ||
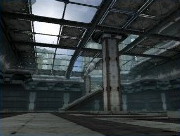
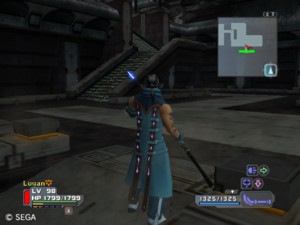
| − | | rowspan="4" | [[Image:SP_center_stairs.png|center|thumb|Stairs at back, center]] || A-1 || ''' | + | | rowspan="4" | [[Image:SP_center_stairs.png|center|thumb|Stairs at back, center]] || A-1 || '''Initial Spawn:'''<br>{{RareN |spawn= Go Bajilla{{Fire}}}} || '''Initial spawn:'''<br>Go Bajilla{{Lightning}} || '''Initial spawn:'''<br>Go Bajilla{{Lightning}} x3 → Bal Soza x1 & Grass Assassin x2 || |
|- | |- | ||
| − | | A-2 || ''' | + | | A-2 || '''Initial spawn:'''<br>{{RareN |spawn= Go Bajilla {{Fire}}}} || '''Initial spawn:'''<br>Go Bajilla{{Fire}} || '''Initial spawn:'''<br>Go Bajilla{{Fire}} x3 → Bal Soza x1 & Grass Assassin x2 || |
|- | |- | ||
| − | | A-3 || ''' | + | | A-3 || '''Initial spawn:'''<br>{{RareY |spawn= Go Bajilla{{Lightning}}→Jarba & Distova}} || '''Initial spawn:'''<br> Go Bajilla{{Lightning}} || '''Initial spawn:'''<br>{{RareN |spawn= Go Bajilla{{Lightning}}x3 → Bal Soza x1 & Grass Assassin x2}} || |
|- {{Color-A}} | |- {{Color-A}} | ||
| − | | A-X || ''' | + | | A-X || '''Initial spawn:'''<br>{{RareY |spawn= Go Bajilla{{Lightning}}→Jarba & Distova}} || '''Left spawn:'''<br>Distova x3 || '''Initial spawn:'''<br>{{RareY |spawn= Go Bajilla{{Fire}} x3→ Grass Assassin x3}} || '''Block 3:<br> {{Seasonal enemy|Rappy}} x3''' |
|- | |- | ||
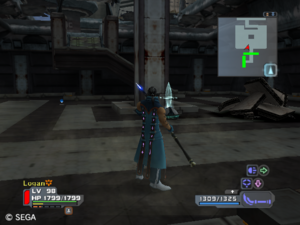
| − | | rowspan="4" | [[Image:SP_right_stairs.png|center|thumb|Stairs at right]] || B-1 || | + | | rowspan="4" | [[Image:SP_right_stairs.png|center|thumb|Stairs at right]] || B-1 || - || - || - || |
|- | |- | ||
| − | | B-2 || | + | | B-2 || - || - || - || |
|- | |- | ||
| − | | B-3 || | + | | B-3 || - || - || -|| |
|- {{Color-A}} | |- {{Color-A}} | ||
| − | | B-X || | + | | B-X || - || - || - || '''Block 3:<br>{{Seasonal enemy|Rappy}} x?''' |
|- | |- | ||
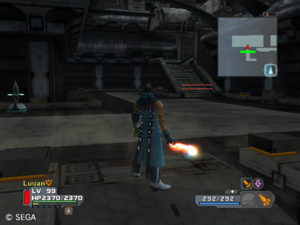
| − | | rowspan="4" | [[Image:SP_left_stairs.png|thumb|center|Stairs at left]] || C-1 || ''' | + | | rowspan="4" | [[Image:SP_left_stairs.png|thumb|center|Stairs at left]] || C-1 || '''Initial spawn:'''<br>{{RareN |spawn= Go Bajilla{{Fire}}}} || - || - || |
|- | |- | ||
| − | | C-2 || ''' | + | | C-2 || '''Key spawn:'''<br>{{RareN |spawn= Volfu x6}} || - || - || |
|- | |- | ||
| − | | C-3 || ''' | + | | C-3 || '''Key spawn:'''<br>{{RareY |spawn= Distova x6}} || '''Initial spawn:'''<br>Go Bajilla{{Lightning}} || '''Initial spawn:'''<br>{{RareN |spawn= Go Bajilla{{Lightning}} x3 → Jarba x1 & Grass Assassin x2}} || |
|- {{Color-A}} | |- {{Color-A}} | ||
| − | | C-X || ''' | + | | C-X || '''Key spawn:'''<br>{{RareY |spawn= Distova x6}} || '''Initial spawn:'''<br> Go Bajilla{{Lightning}} x3→ Jarba{{Lightning}}x2 || '''Initial spawn:'''<br>{{RareY |spawn= Go Bajilla{{Fire}} x3 → Grass Assassin x3}} || '''Block 3:<br> {{Seasonal enemy|Rappy}} x6''' |
|} | |} | ||
* '''Pattern A, block 1:''' Initial spawn is always Go Bajilla x5+3, second spawn is always Go Bajilla x?. | * '''Pattern A, block 1:''' Initial spawn is always Go Bajilla x5+3, second spawn is always Go Bajilla x?. | ||
| − | |||
* '''Pattern B, blocks 1 and 2:''' Initial spawn is always Go Bajilla x4. | * '''Pattern B, blocks 1 and 2:''' Initial spawn is always Go Bajilla x4. | ||
* '''Pattern C, block 1:''' Initial spawn is always Go Bajilla x6+2. | * '''Pattern C, block 1:''' Initial spawn is always Go Bajilla x6+2. | ||
Revision as of 04:55, 26 May 2010
| This article pertains to an item, mission or other feature from the offline version of Ambition of the Illuminus. |
| Scarred Planet | |
|---|---|
| Start counter | Flyer Base |
| Field | Old Rozenom |
| Mission type | Free mission |
| Enemy elements | |
Rozenom City has been reduced to rubble by the G. Colony impact, and its former residents are defenseless against the violent native creatures.
Mission requirements and rewards
| LV | Req. LV | Enemy LV | S-rank reward | Rank S | Rank A | Rank B | Rank C | ||||
|---|---|---|---|---|---|---|---|---|---|---|---|
| Meseta | Points | Meseta | Points | Meseta | Points | Meseta | Points | ||||
| A | 40 | 60+ | Junaline x3 | 9050 | 81 | ? | ? | ? | ? | 0 | 0 |
| S | 50 | 120+ | Terseline x2 | 17550 | 151 | ? | 100 | ? | ? | 0 | 0 |
Enemy spawn chart
- Pattern A, block 1: Initial spawn is always Go Bajilla x5+3, second spawn is always Go Bajilla x?.
- Pattern B, blocks 1 and 2: Initial spawn is always Go Bajilla x4.
- Pattern C, block 1: Initial spawn is always Go Bajilla x6+2.
- Pattern A, block 2: PSU-wiki has the note (Turn obstacles ahead) to describe the spawn. This means turn left upon entering the block and destroy the rubble and boxes to make them spawn.
- Pattern C, block 2: PSU-wiki has the note (Left to right under the stairs right) to describe the spawn. This is the spawn across the first bridge over water, not to the far left of the stairs (a dead end room). On S2 there is also a spawn of only 2 Bal Sosa & 1+5 Golmoro with no Rappy spawn. As of 11-17-09 I can confirm that for mission lvl S2 there is not 3 Bal Sosa, only 2 for rappy spawn.
- All patterns, block 3: "Initial spawn" describes the spawn in the room to your left upon entering the block that can actually be skipped.


