If you are looking for Information about PSU Clementine, Go check their Wiki
Difference between revisions of "AOTI offline:White Beast"
From The re-PSUPedia
FluxGryphon (talk | contribs) (New page: {{AOTI offline|sort=F}} __NOTOC__{{Mission infobox (AOTI offline) |Mission name= White Beast |Mission image= center |Planet= Neudaiz |Start counter= Flyer Base |Fiel...) |
|||
| Line 25: | Line 25: | ||
| S || 50 || 110+ || Ortaceran x3 || 9800 || 85 || 6525 || 56 || ? || ? || 0 || 0 | | S || 50 || 110+ || Ortaceran x3 || 9800 || 85 || 6525 || 56 || ? || ? || 0 || 0 | ||
|} | |} | ||
| + | |||
| + | == Enemy spawn chart == | ||
| + | {| class="wikitable" style="text-align:center" | ||
| + | ! Map route !! Pattern !! Block 1 initial spawn !! Block 2 initial spawn !! Block 3 initial spawn !! Rare enemy details | ||
| + | |- | ||
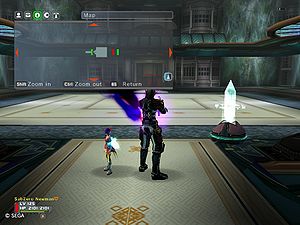
| + | | rowspan="4" | [[Image:wb_doorinfront.jpg|thumb|center|B1: Closed Room<br/>{{RareY |spawn= B2: Open Stairwell down}}<br/>{{RareN |spawn= B2: Closed Room}} ]] || A-1 || '''Initial spawn:'''<br>{{RareN |spawn= Kakwane x5+2}} || '''Initial spawn:'''<br>Gohmon x5 || '''Initial spawn:'''<br>Sageeta x3 || | ||
| + | |- | ||
| + | | A-2 || '''Initial spawn:'''<br>{{RareN |spawn= Kakwane x6}} || '''Initial spawn:'''<br>Sageeta x6 || '''Initial spawn:'''<br>Gohmon x3 || | ||
| + | |- | ||
| + | | A-3 || '''Initial spawn:'''<br>Sageeta x5 || '''Initial spawn:'''<br>Kakwane x6 || '''Initial spawn:'''<br>{{RareN |spawn= Kakwane x3}} || | ||
| + | |- {{Color-A}} | ||
| + | | A-X || '''Initial spawn:'''<br>Sageeta x5 || '''Initial spawn:'''<br>Kakwane x6 || '''Initial spawn:'''<br>{{RareY |spawn= Sageeta x3}} || '''Block 3:<br/>Jaggo x4''' | ||
| + | |- | ||
| + | | rowspan="4" | [[Image:wb_doorinfront.jpg|thumb|center|B1: Closed Room<br/>{{RareY |spawn= B2:Closed Room}}<br/> {{RareN |spawn= B2: Open stairwell down}}]] || B-1 || '''Initial spawn:'''<br>{{RareN |spawn= Sageeta x5}} || '''Initial spawn:'''<br>Kakwane x6 || '''Initial spawn:'''<br>Sageeta x3 || | ||
| + | |- | ||
| + | | B-2 || '''Initial spawn:'''<br>{{RareN |spawn= Kakwane x5+2}} || '''Initial spawn:'''<br>Sageeta x5 || '''Initial spawn:'''<br>Sageeta x3+3+2 || | ||
| + | |- | ||
| + | | B-3 || '''Initial spawn:'''<br>Kakwane x6 || '''Initial spawn:'''<br>Sageeta x6 || '''Initial spawn:'''<br>{{RareN |spawn= Gohmon x3}} || | ||
| + | |- {{Color-A}} | ||
| + | | B-X || '''Initial spawn:'''<br>Kakwane x6 || '''Initial spawn:'''<br>Sageeta x6 || '''Initial spawn:'''<br>{{RareY |spawn= Sageeta x3}} || '''Block 3:<br/>Jaggo x4''' | ||
| + | |- | ||
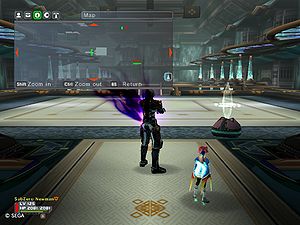
| + | | rowspan="4" | [[Image:wb_stairsinfront.jpg|thumb|center|Open stairwell down]] || C-1 || '''Initial spawn:'''<br>{{RareN |spawn= Sageeta x6}} || '''Initial spawn:'''<br>Kakwane x6 || '''Initial spawn:'''<br>Gohmon x3 || | ||
| + | |- | ||
| + | | C-2 || '''Initial spawn:'''<br>{{RareN |spawn= Kakwane x6}} || '''Initial spawn:'''<br>Gohmon x5 || '''Initial spawn:'''<br>Kakwane x3 || | ||
| + | |- | ||
| + | | C-3 || '''Initial spawn:'''<br>Gohmon x5 || '''Initial spawn:'''<br>Kakwane x5 || '''Initial spawn:'''<br>Sageeta x3 || | ||
| + | |- {{Color-A}} | ||
| + | | C-X || '''Initial spawn:'''<br>Gohmon x5 || '''Initial spawn:'''<br>Kakwane x5 || '''Initial spawn:'''<br>Sageeta x3 || '''Block 3:<br/>Jaggo x4''' | ||
| + | |} | ||
| + | * C-3 and C-X have exactly the same initial spawns. When you get to block 3 just go downstairs to see if [[Jaggo]]s spawn. | ||
Latest revision as of 18:19, 17 May 2010
| This article pertains to an item, mission or other feature from the offline version of Ambition of the Illuminus. |
| White Beast | |
|---|---|
| Start counter | Flyer Base |
| Field | Pavilion of Air: Top |
| Mission type | Free mission |
| Enemy elements | |
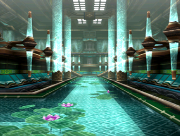
An accident in the Pavilion of Air on Ohtoku Mountain has released native creatures into the temple. Purify the creatures, include the Alterazgohg!
Mission requirements and rewards
| LV | Req. LV | Enemy LV | S-rank reward | Rank S | Rank A | Rank B | Rank C | ||||
|---|---|---|---|---|---|---|---|---|---|---|---|
| Meseta | Points | Meseta | Points | Meseta | Points | Meseta | Points | ||||
| C | 25 | 35+ | Ortasilica x10 | 3350 | 32 | ? | ? | ? | ? | 0 | 0 |
| B | 40 | 60+ | Ortacarbon x7 | 5500 | 49 | ? | ? | ? | ? | 0 | 0 |
| A | 40 | 85+ | Ortaresin x5 | 7650 | 67 | ? | ? | ? | ? | 0 | 0 |
| S | 50 | 110+ | Ortaceran x3 | 9800 | 85 | 6525 | 56 | ? | ? | 0 | 0 |
Enemy spawn chart
| Map route | Pattern | Block 1 initial spawn | Block 2 initial spawn | Block 3 initial spawn | Rare enemy details |
|---|---|---|---|---|---|
| A-1 | Initial spawn: Kakwane x5+2 |
Initial spawn: Gohmon x5 |
Initial spawn: Sageeta x3 |
||
| A-2 | Initial spawn: Kakwane x6 |
Initial spawn: Sageeta x6 |
Initial spawn: Gohmon x3 |
||
| A-3 | Initial spawn: Sageeta x5 |
Initial spawn: Kakwane x6 |
Initial spawn: Kakwane x3 |
||
| A-X | Initial spawn: Sageeta x5 |
Initial spawn: Kakwane x6 |
Initial spawn: Sageeta x3 |
Block 3: Jaggo x4 | |
| B-1 | Initial spawn: Sageeta x5 |
Initial spawn: Kakwane x6 |
Initial spawn: Sageeta x3 |
||
| B-2 | Initial spawn: Kakwane x5+2 |
Initial spawn: Sageeta x5 |
Initial spawn: Sageeta x3+3+2 |
||
| B-3 | Initial spawn: Kakwane x6 |
Initial spawn: Sageeta x6 |
Initial spawn: Gohmon x3 |
||
| B-X | Initial spawn: Kakwane x6 |
Initial spawn: Sageeta x6 |
Initial spawn: Sageeta x3 |
Block 3: Jaggo x4 | |
| C-1 | Initial spawn: Sageeta x6 |
Initial spawn: Kakwane x6 |
Initial spawn: Gohmon x3 |
||
| C-2 | Initial spawn: Kakwane x6 |
Initial spawn: Gohmon x5 |
Initial spawn: Kakwane x3 |
||
| C-3 | Initial spawn: Gohmon x5 |
Initial spawn: Kakwane x5 |
Initial spawn: Sageeta x3 |
||
| C-X | Initial spawn: Gohmon x5 |
Initial spawn: Kakwane x5 |
Initial spawn: Sageeta x3 |
Block 3: Jaggo x4 |
- C-3 and C-X have exactly the same initial spawns. When you get to block 3 just go downstairs to see if Jaggos spawn.


